Watching DVD movies on a big-screen projector turns your living room into a home theater. To enjoy your DVD collection on an immersive 100+ inch display, you just need a few basic cables and adapters.
In this guide, we provide a step-by-step walkthrough for connecting both modern HDMI DVD players and older component/composite models to a projector. Soon you’ll be hosting cinematic movie nights!
Benefits of Connecting a DVD Player to a Projector
Here are some of the benefits of hooking up your DVD player to a projector:
- Huge screen size – Project a movie across a much larger image than even the biggest TV can provide.
- Cinematic experience – With a dark room and big screen, movies look incredibly immersive with a true theater vibe.
- Nostalgia – Play your old DVD favorites on disc for superior quality over streaming.
- Portability – Move the projector between rooms or take it to a friend’s house while still connecting your DVD player.
- Multiple inputs – Switch over to streaming sticks, gaming systems or cable/satellite boxes using the projector’s HDMI inputs.
Now let’s go through the steps to connect modern and older DVD players.
Modern DVD Player Connection (HDMI)

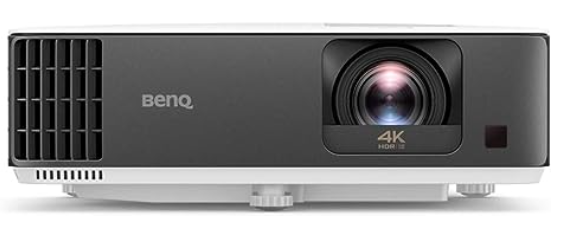
Experience the pinnacle of gaming and entertainment with the BenQ TK700STi 4K HDR Gaming Projector. Immerse yourself in stunning 4K visuals at a smooth 60Hz refresh rate, all with impressively low 4.16ms latency that keeps you in the heart of the action. Designed to elevate your gaming experience, this projector boasts 3000 lumens of brightness, ensuring vibrant and detailed images even in well-lit rooms.
Newer DVD players output video over an HDMI cable, making projector connections easy:
Step 1: Connect an HDMI cable
Run an HDMI cable from the HDMI output port on the back of the DVD player to the HDMI input port on the projector. This carries the digital video and audio signal.
Step 2: Turn on DVD player and select input on projector
Power on the DVD player and projector. Using the projector remote, select the HDMI input the DVD player is connected to.
Step 3: Insert DVD and press play!
Pop in a DVD, press play on the player and the movie will start projecting on the big screen! HDMI carries 1080p HD video for superior movie watching.
Step 4: Connect external speakers (optional)
The projector speakers will transmit the movie audio adequately, but you can connect the projector’s audio output to a surround sound system or speakers for an even more powerful cinematic experience.
Older DVD Player Connection (RCA)
For older DVD players that lack HDMI and use composite RCA cables, use this connection method:
Step 1: Connect three RCA cables
Connect the yellow, red, and white RCA video and audio cables from the RCA outputs on the DVD player to the corresponding RCA inputs on the projector. Match the cable colors for video and stereo left/right audio.
Step 2: Set projector input to RCA
On the projector remote, select the composite RCA input corresponding with the connected jacks. Older DVD players typically output 480i resolution over RCA.
Step 3: Enable 16:9 aspect ratio
In the projector settings, set aspect ratio to 16:9 widescreen for proper DVD movie formatting.
Step 4: Play DVD and enjoy!
Insert a disc, press play on the DVD player, and the movie will start projecting. Use the projector menu to adjust brightness, contrast, and picture settings as needed.
And that’s all there is to it! With just an HDMI or RCA cable connected securely, you can start watching your DVD collection on an extra large projected display. Host movie marathons, cinema nights, or just casual viewing on a screen measured in feet, not inches. Relive classics and old favorites through the projector!
Projector Placement Tips for DVD Watching

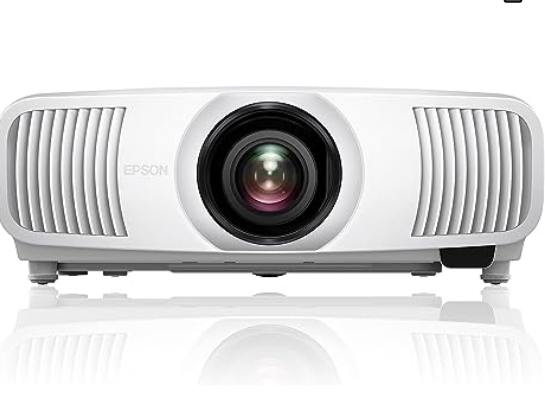
Elevate your home theater with the Epson Home Cinema LS12000 4K PRO-UHD Laser Projector. Immerse yourself in a world of vibrant visuals and stunning clarity. This advanced projector utilizes cutting-edge technology to deliver a true 4K experience, displaying a crystal-clear 3,840 x 2,160-pixel image with precision and accuracy.
To optimize the experience, position the projector properly in your home theater or living room:
- Place the projector 12-15 feet away from the wall or screen to allow space for maximum image size.
- Mount the projector 2-3 feet above the ground and aim it straight at the wall.
- Angle a ceiling mounted projector slightly downward.
- Make sure no furniture obstructs the projection beam path.
- Add bias lighting behind for better contrast without fully darkening the room.
Gear to Improve Projected DVD Playback
Invest in these additional gadgets and accessories take your DVD projector setup to the next level:
- DVD player with HDMI – Newer players output digitally over HDMI for best connectivity and HD 1080p quality.
- Long HDMI cable – Use a 10-15 feet high-speed HDMI cable for projector distance.
- Surround sound system – A 5.1 or 7.1 speaker system adds immersive theater audio.
- Universal remote – A programmable remote operates both the projector and media components.
- Projector screen – A fixed frame or pull-down screen optimizes the projected image.
- Projector mount – Mount the projector from the ceiling for ideal placement and image size.
Immerse Yourself in DVD Movies on the Big Screen

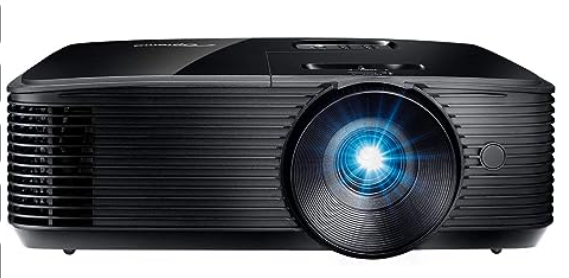
Elevate your entertainment experience with the Optoma HD146X High Performance Projector, designed for both movies and gaming enthusiasts. Immerse yourself in cinematic picture quality with native 1080p resolution (1920×1080) and the RYGCWB color wheel, delivering vibrant and crisp high-definition images that bring your content to life with precision.
Connecting a DVD player to a home theater projector provides cinematic scale entertainment right in your own living room. Follow the simple connectivity steps outlined to hook up either HDMI or composite RCA cables between the devices. Position the projector optimally, get the biggest screen size for your room, add booming sound, dim the lights, and enjoy uncompromising video quality showcasing your DVD collection!

