Tablets are great for portable computing and entertainment. But their small screens can’t compare to the huge display size of a projector. Follow this guide to learn how to connect your Android or iOS tablet to a projector for presentations, movies, photos, and more on an ultra-big-screen experience.
We’ll cover the required adapters, cables, and settings to mirror your tablet’s screen onto a projected display up to 300 inches. Once connected properly, you can turn any wall into a giant tablet monitor perfect for business or leisure.
Benefits of Connecting a Tablet to a Projector
Here are some of the advantages of hooking up your tablet to a projector:
- Huge display – Project a screen up to 300 inches diagonally, much larger than a TV. Great for presentations, videos, and gaming.
- Portability – Carry your tablet then easily connect it anywhere there is a projector available.
- Wireless connectivity – No wires required with wireless mirroring. Move freely around the room.
- Touchscreen interactivity – Use the tablet’s touch interface to control the projected presentation.
- Versatile functionality – Project documents, photos, videos, apps, games, and anything else on your tablet.
Step-by-Step Setup process.
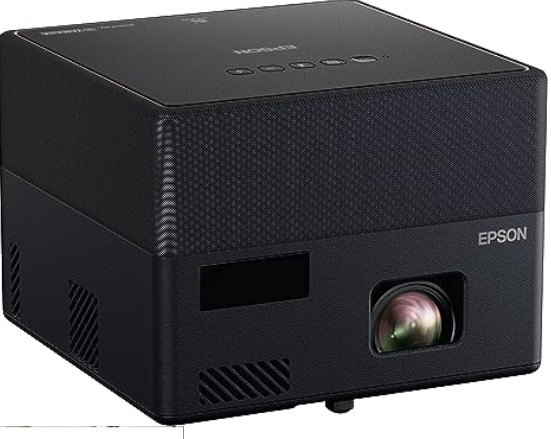
As Epson’s most compact laser projector, the EpiqVision Mini EF12 really shines for campsite viewing. It offers 800 lumens brightness, up to 150 inches image size, and built-in Android TV with streaming apps. Weighing under 3 pounds with 3-hour battery life, this is the ultimate streaming projector for camping.
Step 1: Position the Projector Properly
First, set up the projector in the room for optimal image size. Consider these factors:
- Distance from the projection wall or screen
- Height from the ground
- Lens angle centered on the wall
- Obstacles that may block the projected light
Use the projector’s depth, shift, and keystone settings to square up the image.
Step 2: Mirror Wirelessly with Screen Casting
The easiest way to display your tablet on the projector is using wireless screen mirroring or casting:
iOS devices – Use AirPlay to cast the iPad/iPhone screen to the projector. Make sure the projector is AirPlay compatible, or connect an AirPlay dongle.
Android devices – Use the built-in Cast feature to mirror your Android tablet or phone screen. The projector must support Chromecast casting.
Wireless casting provides up to 1080p resolution without any cables to connect.
Step 3: Connect with HDMI Adapter Cable
Alternatively, use an HDMI adapter to connect your tablet to the projector:
- Android – Use a USB-C to HDMI adapter compatible with your model.
- iOS – Connect the Lightning Digital AV Adapter from iPad/iPhone to projector HDMI.
- Select the correct HDMI input on the projector remote.
HDMI provides the highest quality wired video signal. Make sure to get an adapter that works with your specific tablet.
Step 4: Connect with Chromecast Device
If your projector lacks wireless casting, plug a Chromecast into the HDMI port.
- Cast content from compatible tablet apps directly to the Chromecast plugged into the projector.
- Allows wireless connection but lower quality than native apps or HDMI.
- Chromecast also enables casting web browser tabs from the tablet.
Step 5: Connect Bluetooth Speaker
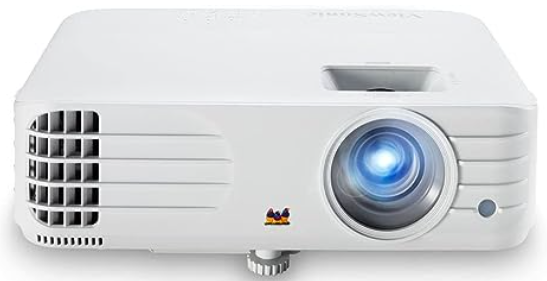
Step into a world of supersized entertainment with the ViewSonic PX701HD 1080p Projector. Immerse yourself in cinematic experiences and captivating gameplay with Full HD resolution (1920x1080p) on a screen that can span up to an impressive 300 inches, bringing theater-like colors to life.
The small built-in speakers on most tablets won’t provide great sound through the projector. Instead, use a portable Bluetooth speaker:
- Pair the Bluetooth speaker with your tablet’s audio output.
- Position the speaker properly to clearly transmit sound through the room.
- Adjust volume on both the tablet and external speaker.
A portable speaker provides louder, clearer sound than the tiny tablet speakers can produce.
Step 6: Get the Right Cables
If connecting via HDMI cable, ensure you get the proper adapter and cable length:
- HDMI cable between projector and tablet, minimum 10 feet.
- Adapter suited for your exact model tablet: Lightning to HDMI, USB-C to HDMI, etc.
- 4K rated HDMI cable if the tablet/projector support 4K video.
- Coiled HDMI cables allow stretching to needed length.
Having the right adapter and cable ensures seamless video connectivity.
Step 7: Adjust Projector Settings
Once connected, optimize the projector settings for your particular tablet:
- Brightness/Contrast – Increase brightness and contrast closer to max.
- Aspect Ratio – Match the tablet’s screen shape, likely 16:9.
- Resolution – Set projector resolution to match the tablet output.
- Picture Mode – Use a dynamic/bright mode for apps, standard mode for photos.
Dialing in these settings helps maximize the visual performance.
Step 8: Launch Tablet Apps
You’re now ready to project any apps, content or media from your tablet:
- Video streaming apps like Netflix, Disney+ for big-screen movies
- YouTube, TikTok, Twitch on a giant display
- Web browsers to navigate internet on a larger display
- Photo slideshows and apps
- Drawing/painting apps
- Mobile games
- PDFs and documents
The possibilities are endless when your tablet meets a projector!
Troubleshooting Tips
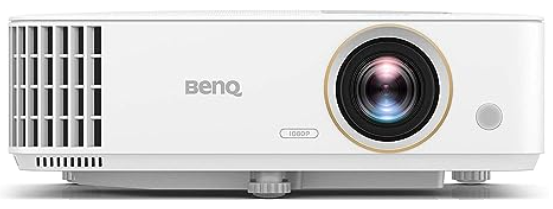
Experience gaming and entertainment like never before with the BenQ TH685 1080p Gaming Projector. This powerhouse projector offers remarkable features that enhance your gaming and viewing experiences to the next level.
With 1080p resolution and 4K HDR support, the projector boasts a stunning 3500 ANSI lumen brightness that brings your content to life with exceptional clarity. Enjoy vivid and vibrant colors with 95% Rec. 709 color accuracy, allowing you to immerse yourself in an authentic visual experience.
If you encounter issues projecting your tablet, try these troubleshooting tips:
- Restart the tablet and projector
- Ensure all cables are securely connected
- Try an alternate HDMI port on the projector
- Repair Bluetooth devices
- Check for projector software/firmware updates
- Toggle through all HDMI inputs on the projector remote
- Adjust projector resolution and aspect ratio
Transform Your Tablet Experience
Connecting your Android or iOS tablet to a projector enables you to enjoy your apps, photos, videos, presentations, and more on an extraordinarily large display size.
With the step-by-step guide above, you can quickly mirror your tablet wirelessly or through HDMI adapter cables. Position the projector appropriately, adjust the settings, connect sound, and power on your favorite apps to see them in a whole new light!
