Gaming on a projector can transform your PlayStation 4 experience, letting you play on a super-sized image rivaling a commercial theater screen. Follow this simple guide to hook up your PS4 to a projector and turn your living room into a full arcade gaming den.
We’ll cover the best connection methods, ideal projector settings, placement tips, and recommendations on screens and cables to build your ultimate big-screen gaming setup.
Benefits of Connecting a PS4 to a Projector
Here are some of the benefits of hooking up your PlayStation 4 to a projector instead of a conventional TV:
- Huge image size – Project screens up to 300 inches for immersive gaming. Way bigger than even the largest TVs.
- Theater-like experience – Superior audiovisual experience with a true cinematic feel. Games look and sound incredible.
- Flexible placement – Position the projector anywhere with a clear wall or projection screen.
- Portability – Easily move the projector for gaming in different rooms in your home.
- Multiplayer fun – Big projected gameplay is perfect for multiplayer parties and watching friends battle it out.
Step-by-Step setup process.

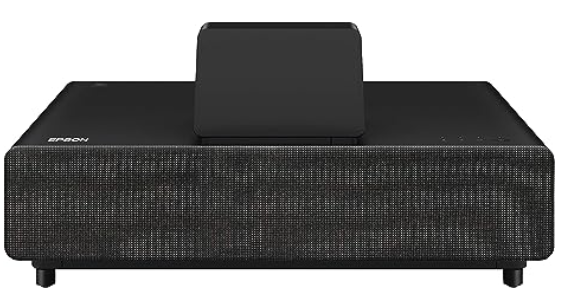
Elevate your entertainment experience with the Epson EpiqVision Ultra LS500 Laser Ultra Short Throw Projector. This cutting-edge projector offers stunning picture quality and advanced features for immersive viewing of your favorite TV shows, sporting events, gaming, and movies.
Experience an impressive picture quality of up to 130 inches with immersive brightness and clarity. Accepting content up to 4K, the projector delivers an incredible Full-HD HDR picture (1) that captivates your senses.
Step 1: Place the Projector Properly
Determining projector placement is crucial for getting the largest possible screen size that fits your room layout. Consider these factors:
- Distance from wall – Longer throw distance increases image size. Minimum is around 6 feet, optimal 10-12 feet.
- Projection angle – Aim the projector lens straight at the wall or screen at a 90 degree angle for best focus.
- Height – Position the projector 2-3 feet above the ground angled slightly downward.
- Obstacles – Ensure no furniture blocks the projected image. Adjust placement to optimize screen dimensions.
Take measurements and consider using a projector mount for ideal placement.
Step 2: Connect HDMI Cable from PS4 to Projector
HDMI is the best connection method between the PS4 and projector for uncompressed hi-def video and audio:
- Use HDMI cable length suitable for room size. 10-15 feet is common for home setups.
- Plug one end into the HDMI port on the PS4.
- Connect the other end to an HDMI input port on the projector.
- Turn both devices on and select the correct HDMI input on projector.
HDMI carries 1080p video signal and digital surround sound for optimal gaming performance.
Step 3: Connect Power to Projector
Ensure the projector is plugged into a power outlet and turned on. Test the projection angle and size on the wall before continuing.
For a dedicated gaming setup, you can install a projector ceiling mount to optimize the image position.
Step 4: Dial In Projector Settings
Adjust these projector menu settings for ideal PS4 gaming display:
- Brightness – Increase brightness for improved color vibrancy.
- Contrast – Boost contrast close to max for vivid graphics and details.
- Display mode – Switch to a gaming display mode with pure colors and fast response.
- Aspect ratio – Match the PS4 output, likely 16:9 widescreen for modern titles.
- Resolution – Set projector to 1080p if both devices support it, or at least 720p.
Adjusting these visual settings helps gaming graphics pop off the screen with sharpness and dynamic range.
Step 5: Get Proper Cables and Accessories
Don’t skimp on supporting gear for your projector PS4 setup:
- High-speed HDMI cables – Use cables rated for 18 Gbps to handle 4K HDR signals.
- 3D glasses – To play PS4 games in 3D, active shutter 3D glasses are required.
- Gaming projector – Consider a fast response gaming model with enhanced input lag.
- Surge protector – Use a surge protector to prevent power spikes damaging the expensive projector.
- Universal remote – A programmable remote operates both the projector and PS4.
Step 6: Set Up Projector Audio
Powerful audio completes the cinematic gaming environment:
- Use built-in speakers – Most projectors have 10 watt stereo speakers adequate for gaming.
- Connect external speakers – For bigger sound, connect the projector audio output to a surround sound system.
- Adjust audio settings – Enable surround sound and boost bass and treble for more gaming immersion.
- Add soundbar or subwoofer – These add volume and thumping low-end to game effects and soundtracks.
Step 7: Get a Projection Screen
A dedicated projection screen improves picture quality:
- Blank white wall – Bare drywall or painted wall works fine on a budget.
- Dedicated screen – Purpose-built screens have gain, wide viewing angle, and light rejection.
- DIY screen – Make your own from wood, canvas, or sheet. Add white paint for improved brightness.
- Inflatable screen – Portable blow-up screens provide huge images both indoors and outdoors.
A quality screen prevents color washout and image fading in ambient light.
Step 8: Dim Room Lights
To maximize projection quality, games look best when viewed in darker room conditions. Consider options like:
- Blackout curtains – Prevent outdoor light entering the room from windows.
- Turn off lights – Flick the light switch or smart bulbs off when gaming.
- Table lamp – Keep a small low-wattage lamp on for convenience without washing out image.
- Bias lighting – LED backlight illuminates the wall behind the screen while keeping room darker.
The darker the room, the more immersive the gaming experience will be. Avoid bright overhead lights shining directly on the projection surface.
Enjoy Big Screen PS4 Gaming

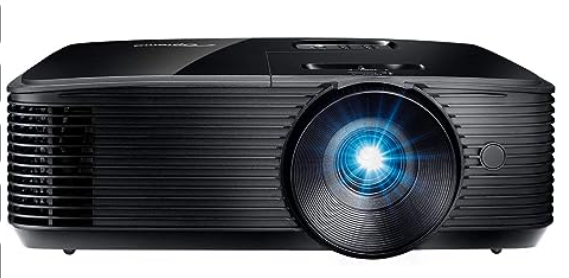
Elevate your entertainment experience with the Optoma HD146X High Performance Projector, designed for both movies and gaming enthusiasts. Immerse yourself in cinematic picture quality with native 1080p resolution (1920×1080) and the RYGCWB color wheel, delivering vibrant and crisp high-definition images that bring your content to life with precision.
Following the steps above, you will have an awesome projection setup ready for playing PlayStation 4 on the big screen. Filling an entire wall with a 100+ inch display takes gaming realism to the next level.
Make sure to dial in projector picture settings for vibrant colors and use a quality screen suited for the room. Take time positioning the projector for maximum screen size from optimal throw distance. Connect your PS4 using a high-speed HDMI cable and add powerful sound.
Dim the lights, power on your favorite PS4 games, grab the controller, and enjoy entry into projector gaming nirvana!

